RA 6.3 Surface Finish: Definition and Applications
 Nov 19,2024

Surface finish, measured by the Ra (Roughness Average) scale, is crucial for how parts look, perform, and fit together. Ra 6.3 surface finish (6.3 µm or 250 µin) is common in industries where a medium-quality finish is acceptable. Let’s delve into how CNC machining, casting, 3D printing, and metal fabrication achieve this finish.
What is RA in Surface Finish?
In the case of surface finish, RA means the roughness average. Its values are represented with the µm units. Its value shows how the surface is smooth like the peak-to-valley distance in the surface. RA value is significant in the automotive and aerospace industries.
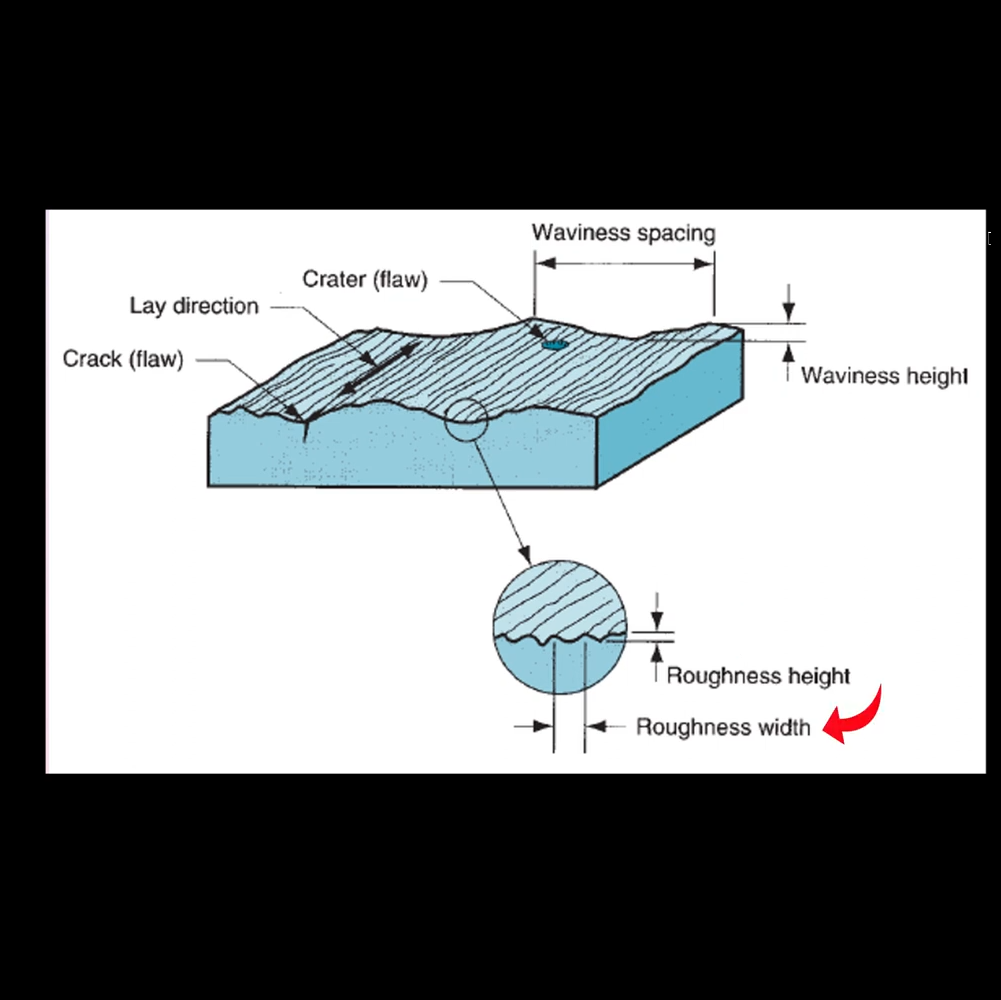
What is RA 6.3 Surface Finish?
6.3 RA surface finish means the 6.3µm surface roughness. It means that the surface is not smooth and used where smoothness is not the primary concern like in architectural components.
Roughness Average Explained
The roughness Average is expressed in µm. Its value decides whether the surface is smooth or not.
Applications of RA 6.3 Surface Finish
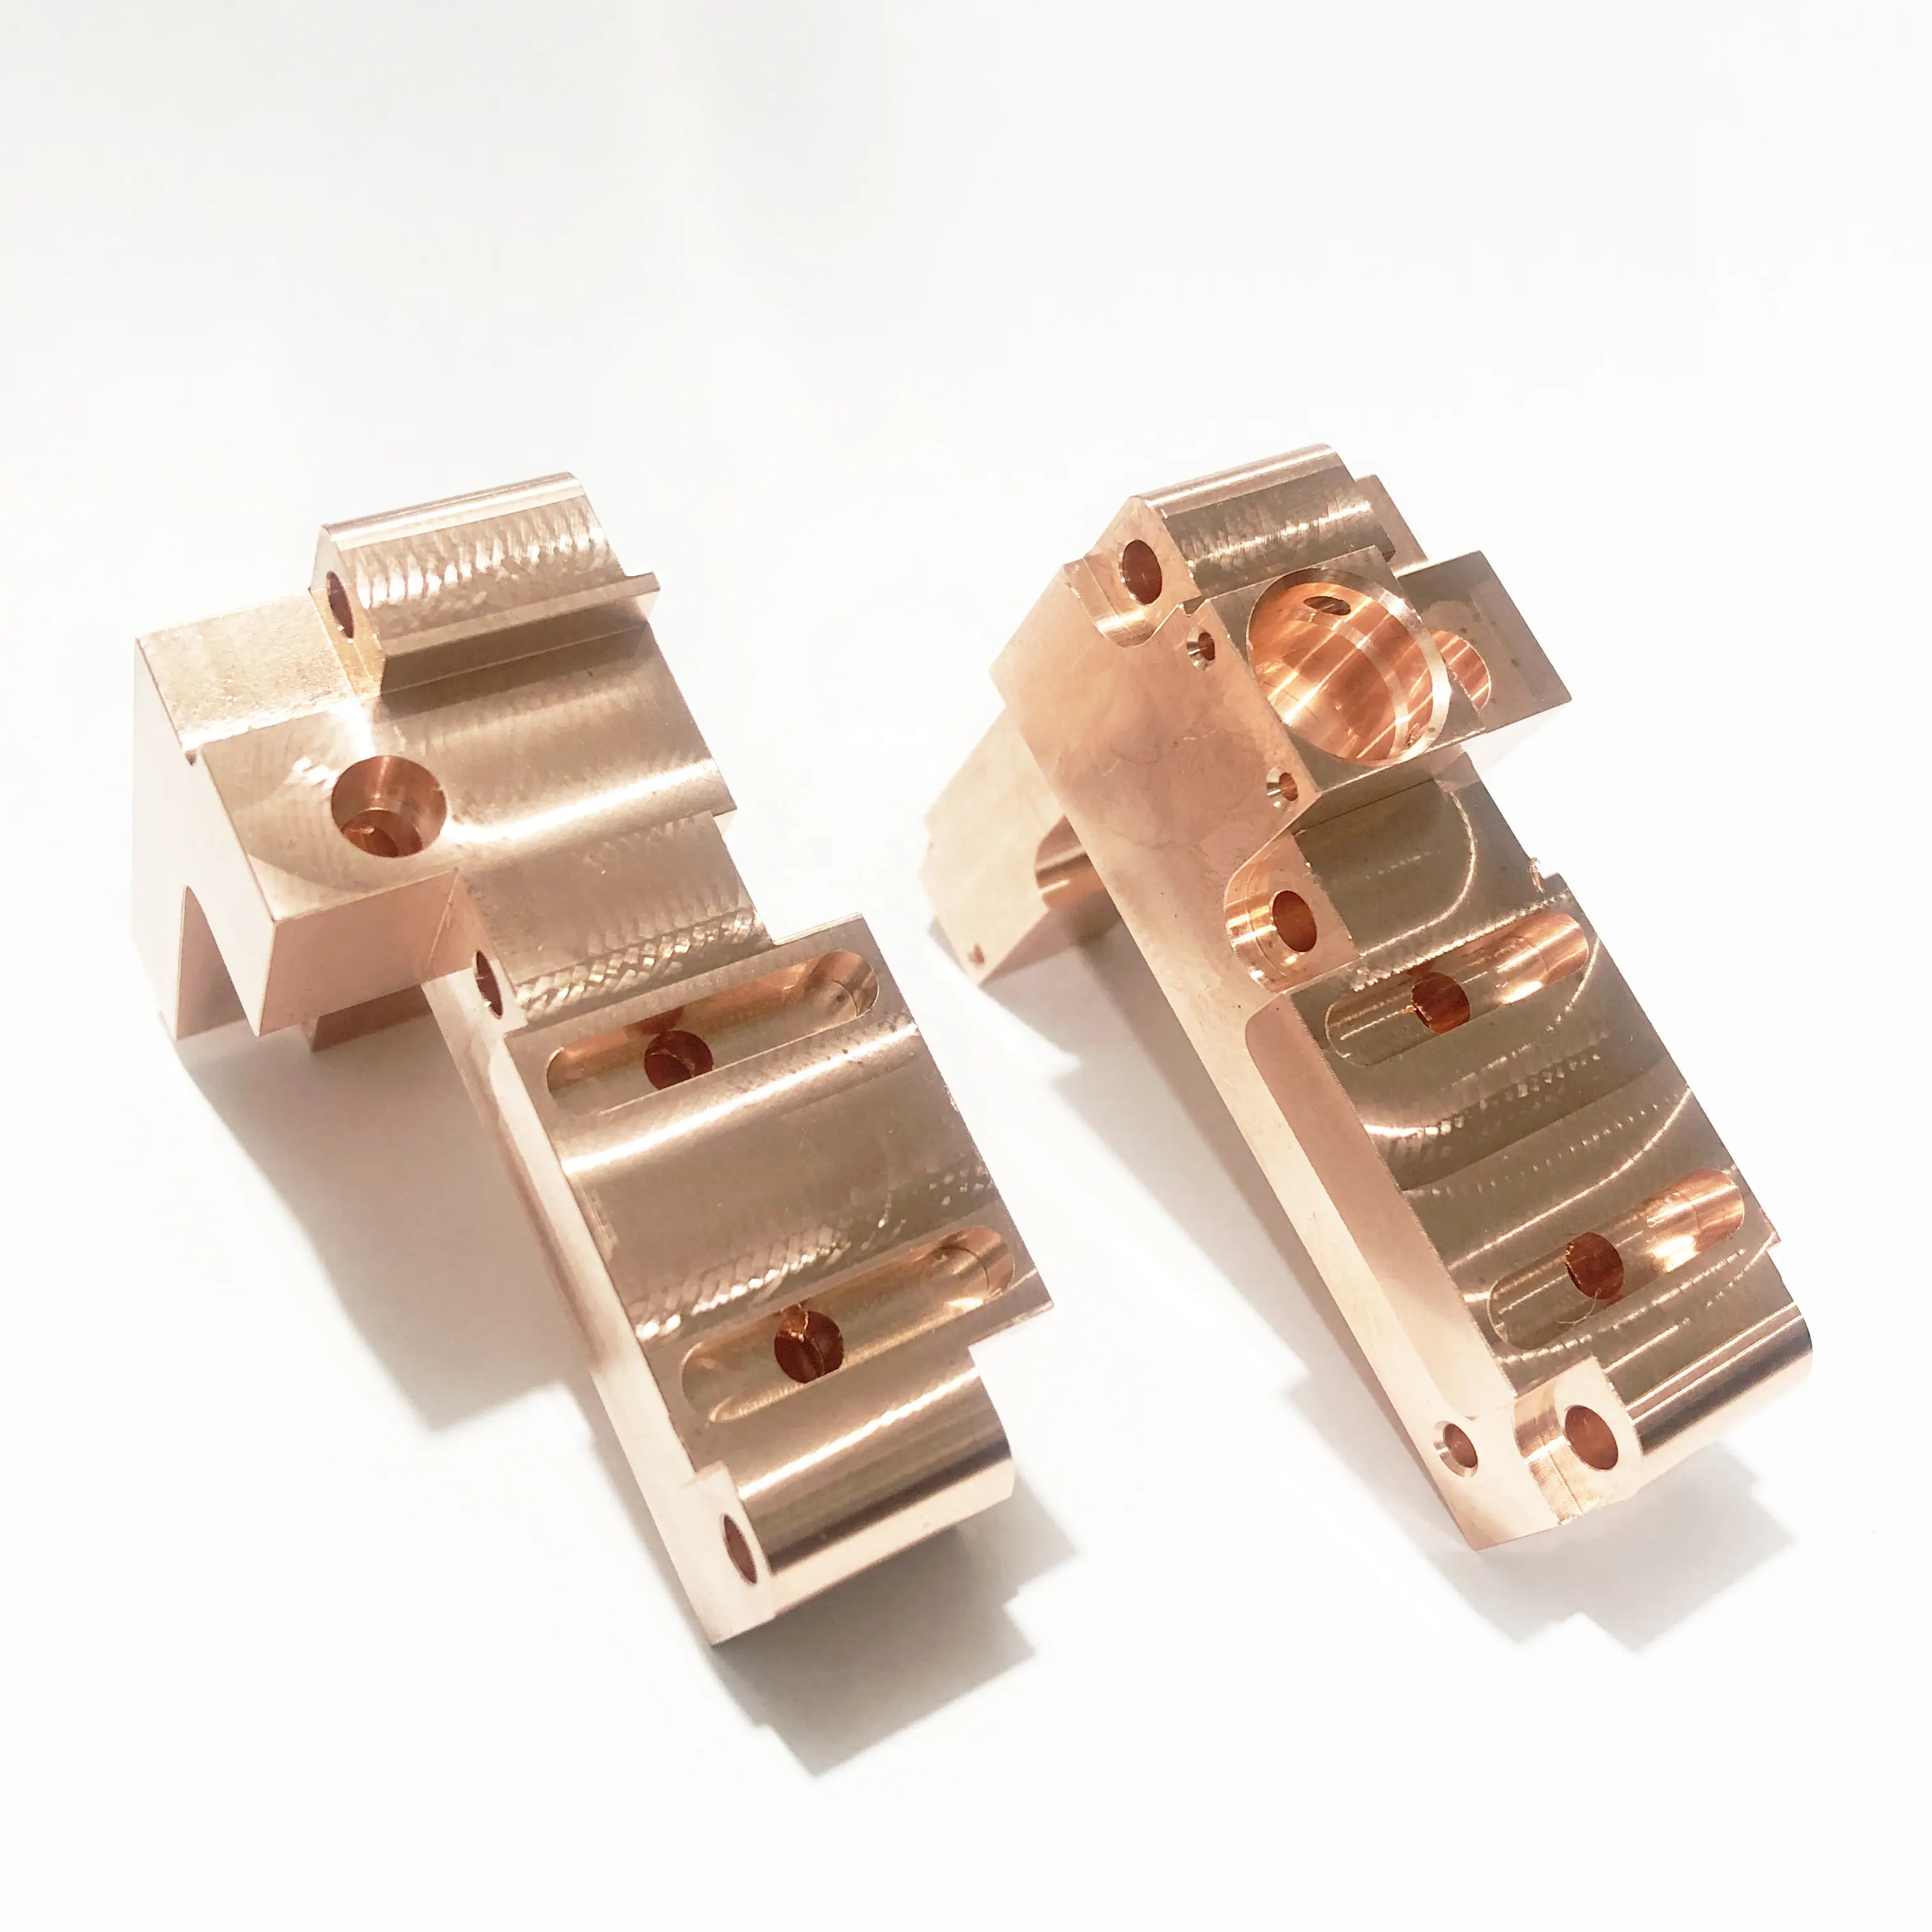
RA 6.3 is not considered as a smooth surface that’s it is used where roughness allowance is given. Its applications include load-bearing components, castings, weld parts and structural components.
Benefits and Limitations of RA 6.3
Benefits of RA 6.3
RA 6.3 requires less machining like no polishing so the low energy and hence the low cost. RA 6.3 means that the surface is rough, so adhesion increases as well. It is easier to weld rough surfaces as well.
Limitations of RA 6.3
Since RA 6.3 is rough that’s why such a surface causes higher friction and stress concentration which further leads to fatigue failure. These limitations make 6.3 RA surfaces less usable.
Measuring Surface Finish
There are many tools which are used to measure surface finish, but here the most used tools are discussed:
Tools for Measuring Surface Roughness
Stylus Profilometers
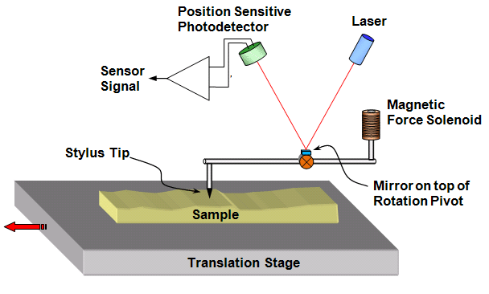
The Stylus tip moves over the sample's surface as shown in the following image. The peak-to-valley distance is recorded as the tip moves over the surface. It is a destructive technique that’s why its tip can damage the soft materials.
Optical Methods
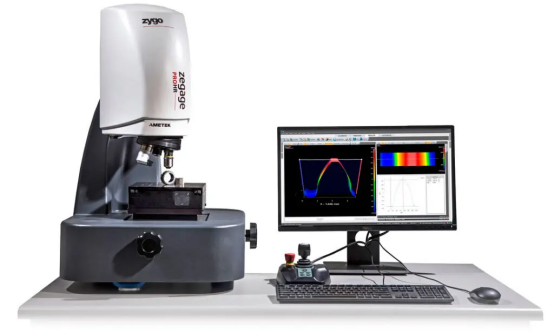
In this technique, the device works the same way as the microscope does. There is no physical contact, that’s why it can be used for soft materials as well. It provides information in the form of a 3D image as it is represented in the following figure.
How to Measure RA
Surface preparation is the first, then any instrument either optical or stylus profilometer can be used to measure RA. Before using any instrument, calibration is checked. The sample is placed in the instrument, and data is represented on the connected computer either in the form of an image or graph.
Factors Affecting Accuracy
There are certain factors you need to know which affect the accuracy of measuring the RA. These factors are contamination i.e. dust, the calibration of the instrument or the surface geometry.
RA Surface Finish Chart
The following chart represents the RA values for different types of surfaces in µin and µm:
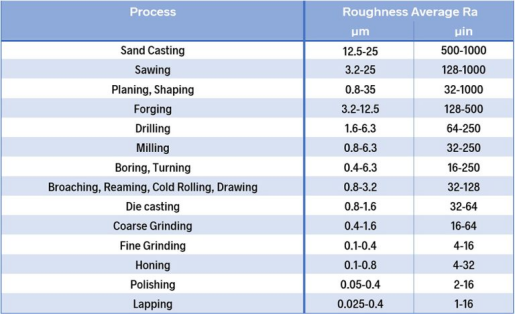
According to the above chart, sand casting is the highest rough surface while lapping is the smoothest.
Differences Between RA 6.3, RA 1.6, and RA 0.8
RA 6.3 shows the rough surface texture. It is easy to achieve this RA with less machining. This value of RA is essential for adhesion and is used in ceramic industries commonly.
RA 1.6 is considered as a fine surface and the surface texture is smooth. It is used where friction is restricted such as bearings, gears etc. To achieve 1.6 RA, additional machining is required as compared to RA 6.3 surface finish.
Very careful machining like polishing is required to achieve RA 0.8 i.e. mirror-like smoothness.
How to Read a Surface Finish Chart
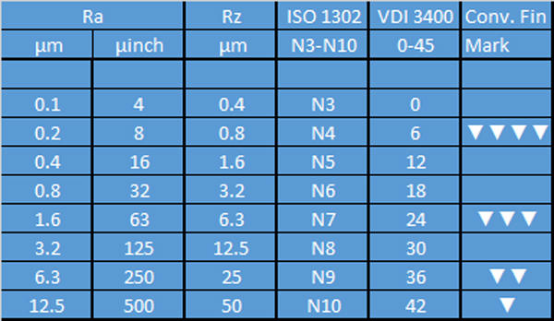
To interpret the values and grades of surface finish through this chart is very easy. For instance, RA 6.3 matches with N9 grade, which means the coarse surface finish and simple operations like turning or milling are performed but polishing is not performed. For better understanding please see the following chart.
RA 1.6 Surface Finish Equivalent
RA 1.6 surface finish is equal to 63µin and N7 grade. It is often achieved with the grinding process.
When to Choose RA 1.6 Over RA 6.3
RA 1.6 is used if the application such as gear, requires higher smoothness and fine fit then 1.6 is important to choose. To achieve this value of RA, additional machining like grinding is also required that’s why the cost is higher.
The cost for 6.3 RA is low because of lower machining costs. It is used for those components where smoothness is not the primary concern.
What is SA 2.5 Surface Finish?
This standard is used to predict the data related to the cleanliness of the surface. SA 2.5 means a 95% clean surface from visible oil, rust etc. Blast cleaning is done to achieve a 95% clean surface for coatings.
SA 2.5 vs RA Surface Finish
SA 2.5 is related to surface cleanliness while 2.5 RA means roughness in the surface. SA 2.5 is used where strong coating adhesion is required such as in marine applications.
Why Use SA 2.5 for Surface Preparation?
SA 2.5 is used to achieve high cleanliness of the surface i.e. 95% for strong adhesion of corrosion-resistant coatings.
How to Calculate Surface Finish
Surface finish is calculated through RA (Roughness Average), Rz (Mean Roughness Depth) and Rt (Total Roughness).
Surface Finish Calculation Methods
The Calculation methods include contact profilometers like stylus profilometers and non-contact profilometers such as laser profilometers.
Understanding Surface Finish Standards
There are two standards ASME guidelines and ISO. ISO 4287/4288 focuses on RA, Rz and Rp and specifies methods to find the surface finish. ASME B46.1 provides information related to surface finish like surface roughness, waviness etc.
Difference Between RA and RT
The roughness average is represented by RA and the total roughness by RT.
Converting RA to Rz and Rt
RA to Rz = 4 - 7 X RA (4 to 7 times of RA)
RA to Rt = 5 – 10 X RA (5 to 10 times of RA)
RA 6.3 Surface Finish Across Manufacturing Methods
CNC Machining and RA 6.3 Surface Finish
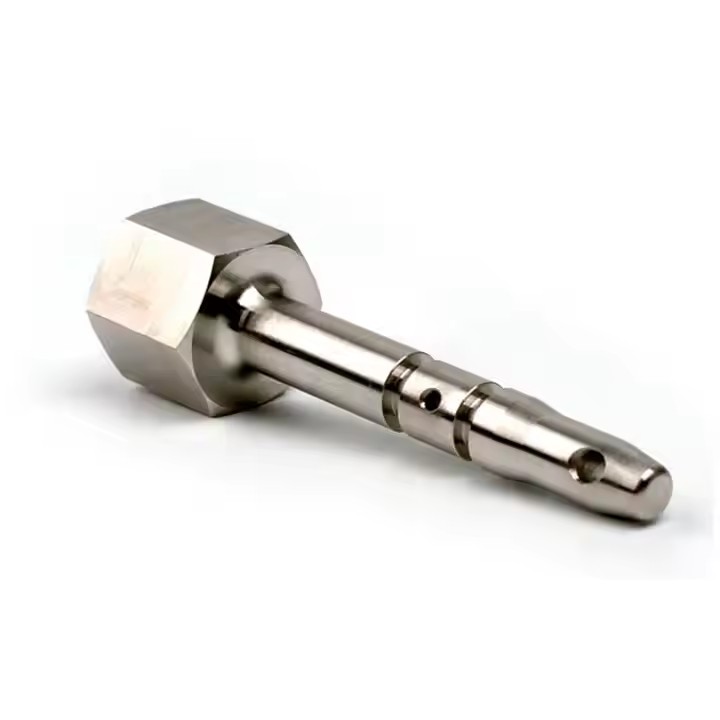
CNC milling or lathes cutting parts. A Ra 6.3 finish is often the result of careful tool choices, cutting speeds, and feed rates. Additional steps like polishing or honing might be used for smoother surfaces. This balance between precision and cost makes CNC machining ideal for medium-rough finishes.
Casting: Shaping with Molds
Which can leave rough surfaces due to cooling or mold texture. To reach Ra 6.3, secondary processes like grinding or sandblasting are often needed. High-quality molds and slow, controlled cooling can also improve the surface finish right from the start.
3D Printing and RA 6.3 Surface Finish
3D printing builds objects layer by layer, naturally leaving a rough finish. To achieve Ra 6.3, post-processing methods like sanding or chemical smoothing are typically required. Some 3D printing technologies, (e.g., FDM, SLA, SLS) produce smoother surfaces initially, reducing the work needed to reach this standard.
Metal Fabrication: Form and Function
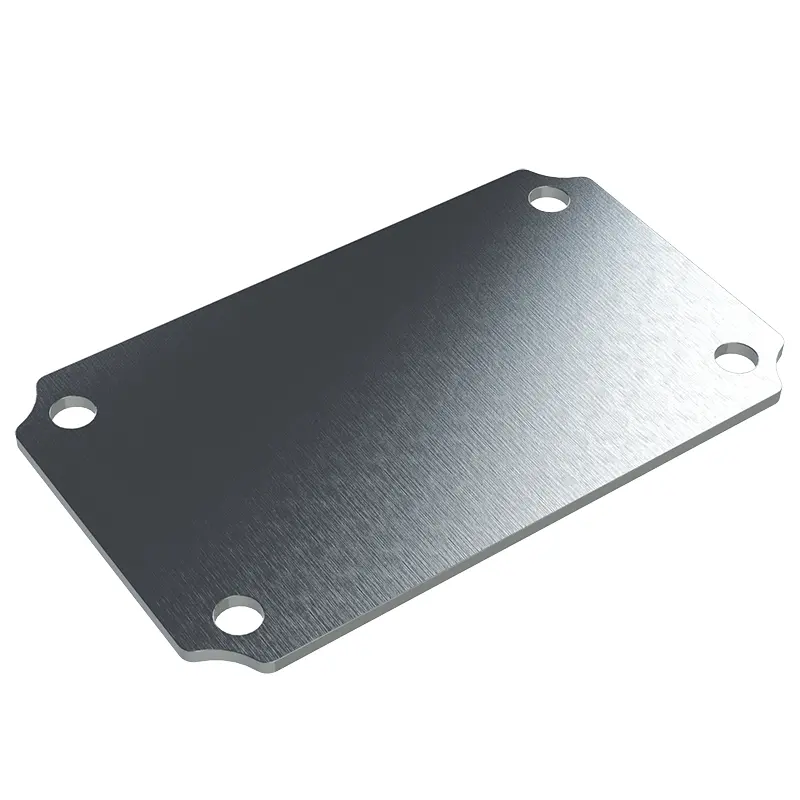
Processes like welding, bending, and cutting often leave rough edges or marks. Grinding, buffing, or brushing is used to refine these surfaces to an Ra 6.3 finish.
Surface Quality and Other Finish Types
Surface quality means the overall condition of the surface and other types of surface finish include brushed surface, polished surface, matt surface, galvanized surface etc.
| Surface Finish Type | Description | Common Applications |
|---|---|---|
| Brushed Surface | Linear texture with a matte look, created by brushing. | Stainless steel products, kitchen appliances, architectural elements. |
| Polished Surface | Shiny and smooth, achieved by buffing or grinding. | Jewelry, automotive parts, precision instruments. |
| Matte Surface | Non-reflective, smooth surface with a modern look. | Consumer electronics, automotive interiors, household items. |
| Galvanized Surface | Metal coated with zinc to prevent rust and corrosion. | Construction materials, fencing, outdoor applications. |
| Anodized Surface | Durable oxide coating on aluminum, often colored. | Aluminum products, electronic enclosures, decorative panels. |
| Powder-Coated Surface | Strong finish made by baking powdered paint onto metal. | Outdoor furniture, industrial equipment, automotive components. |
| Plated Surface | Thin metal layer added for decoration or protection. | Electronics, automotive parts, decorative fittings. |
What Does Surface Quality 60/40 Mean?
It means that 60% surface is smooth or fine while 40% surface is rough or coarse. The rough surface is not durable as compared to a smooth surface because of corrosion risk, friction and wear issues and vice versa.
What RA is a #4 finish?
#4 finish has a roughness average value of 1.6 to 3.2. It’s a brushed surface you can say.
Surface Finish Through Grinding
The value of RA 6.3 is achieved by the grinding process.
RA Value for Mirror Finish
The value for the mirror surface is approximately 0.1 RA It is the smoothest surface, and its smoothness makes it a reflective surface.
 Tel/WeChat:
  Email:
 Home
Home
 Wholesale Custom Herb Grinders and Accessories


